Run your business · Start
Start
Your first result
Take one real inquiry from a connected workspace through to a reviewed action and its receipt.
Updated September 17, 2026 4 min read
When an inquiry arrives, the outcome that matters is a reviewed decision with a recorded result, so you can see who confirmed what and what happened next. This guide follows one inquiry from a workspace you connected through the installation guide all the way to a reviewed action and its receipt, using the same screens your team will use each day.
You need: a connected installation with an owner account, and one inquiry you are willing to run end to end. Optional providers stay off until a workflow needs them, so you can finish this walkthrough with the database and authentication you already configured.
1. Confirm the workspace and enable what you need
Sign in at /admin, then open Setup to confirm the business identity, the database connection, and any provider you intend to use. Each area of the product ships as a module you enable per workspace, so open Modules and turn on contact intake, pipeline, conversations and the work queue. Your workspace explains the membership and business context each screen expects before it shows data.
2. Bring the inquiry in
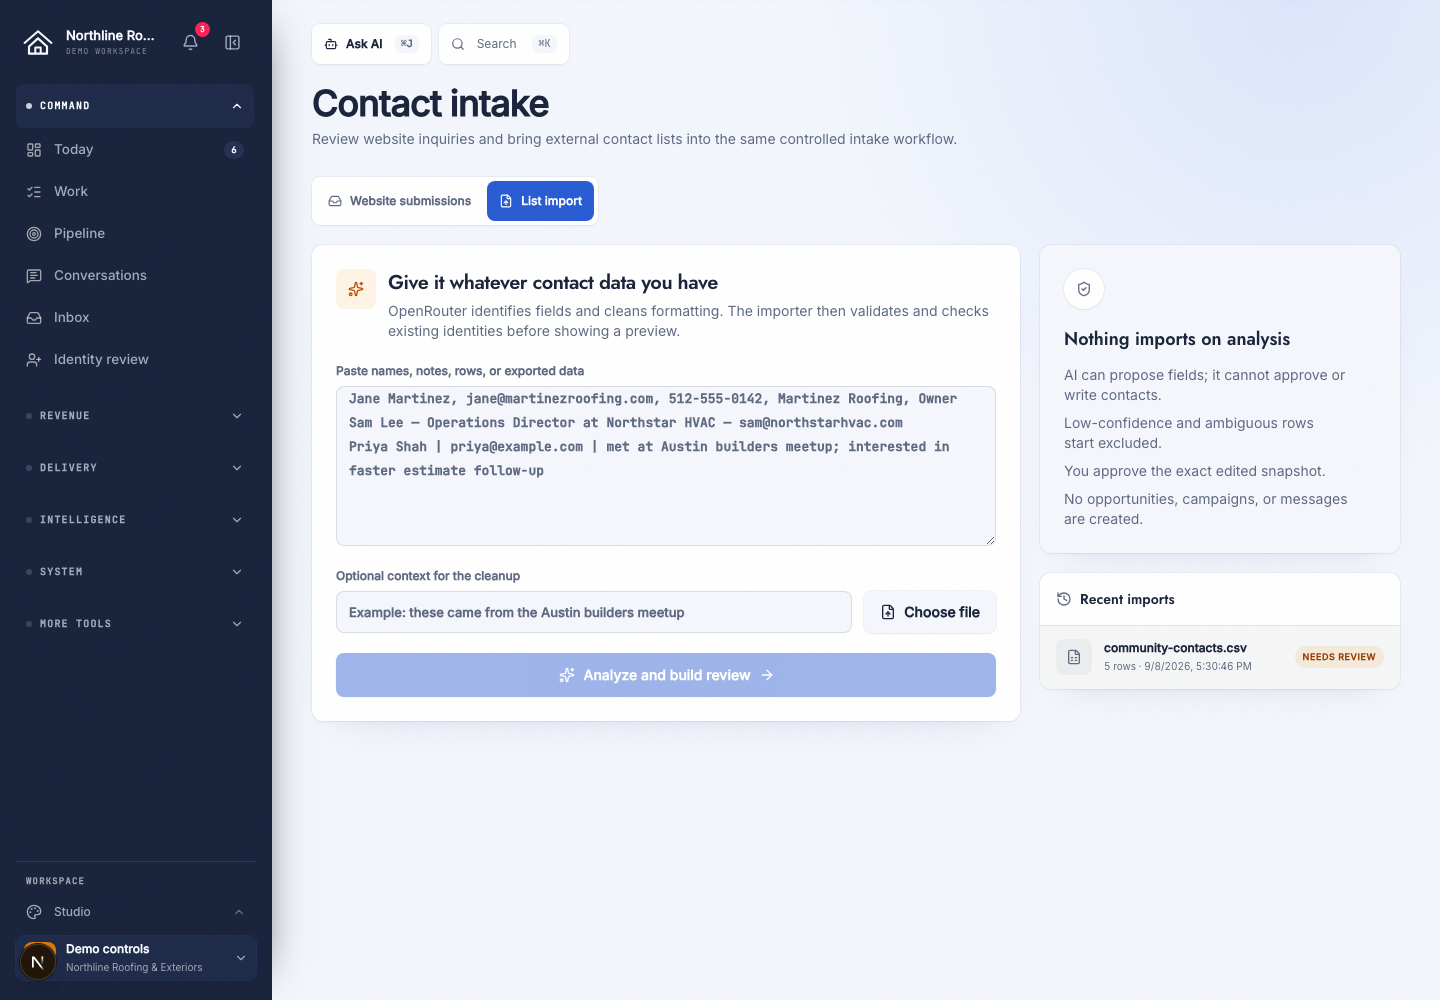
Open Contact intake to review a website submission or import a pasted list of up to 500 rows. The import checks for existing contacts before it saves, which means an address you already store is updated in place, so the same person does not appear twice in your records. Import a contact list covers the columns and the review step, and Contact intake explains what each saved row records.
3. Give the inquiry somewhere to move
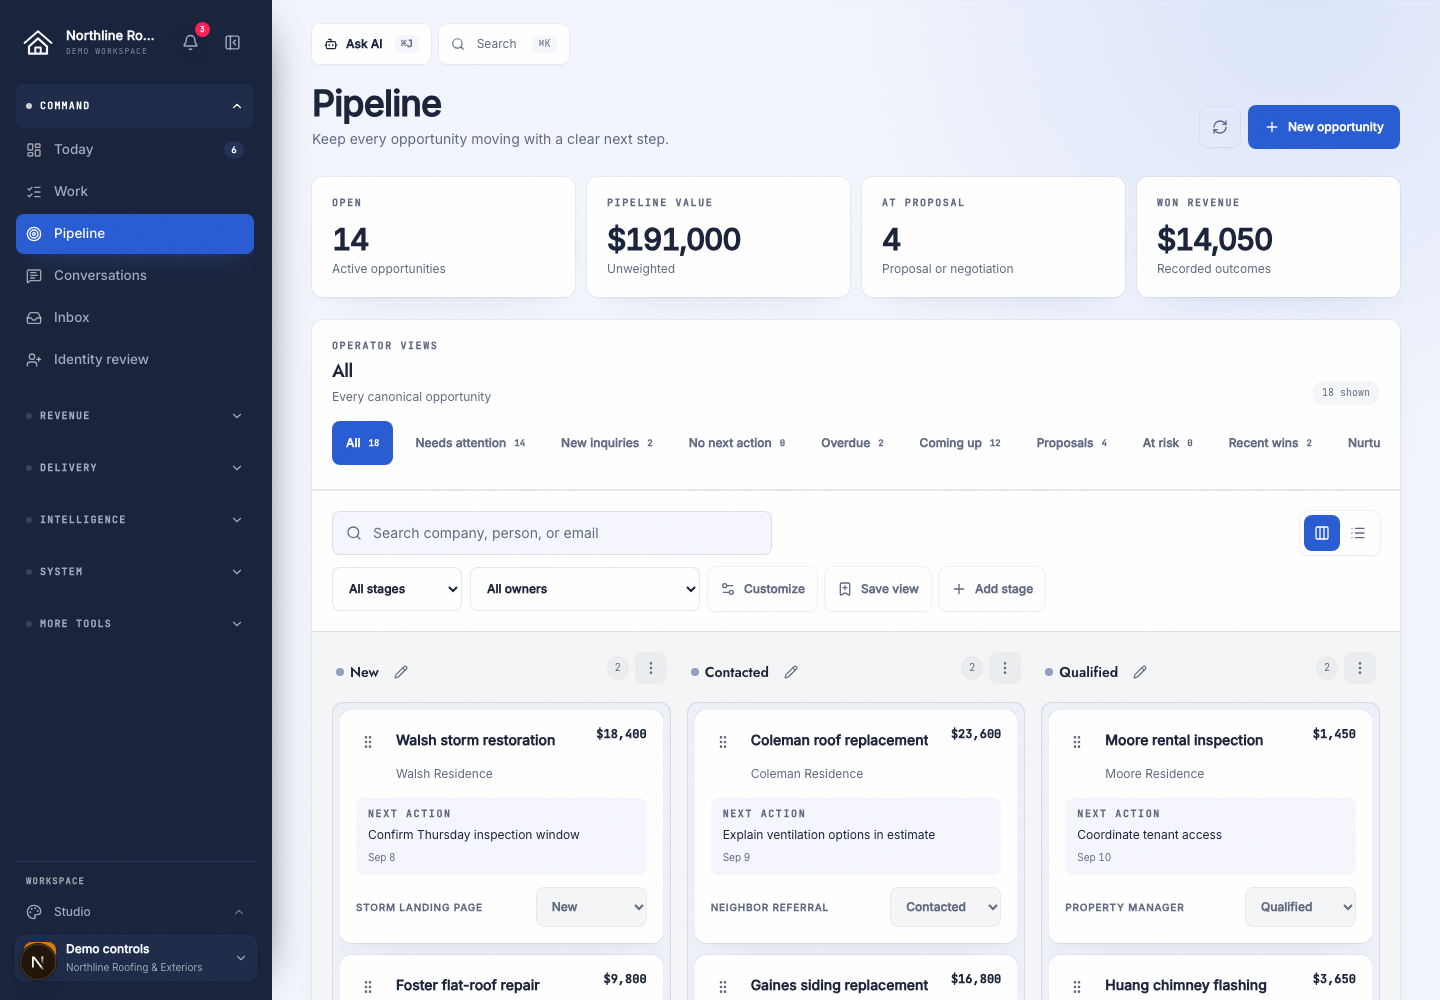
Open Pipeline and attach the person to an existing opportunity or create one with New opportunity. Every stage is a column on the board, and a move records a stage change against that opportunity, so the history travels with the record instead of sitting in an inbox. The pipeline board explains stages, dragging and the stage menu, while Pipeline explains how an opportunity relates to the contacts behind it.
4. Review what the system proposes
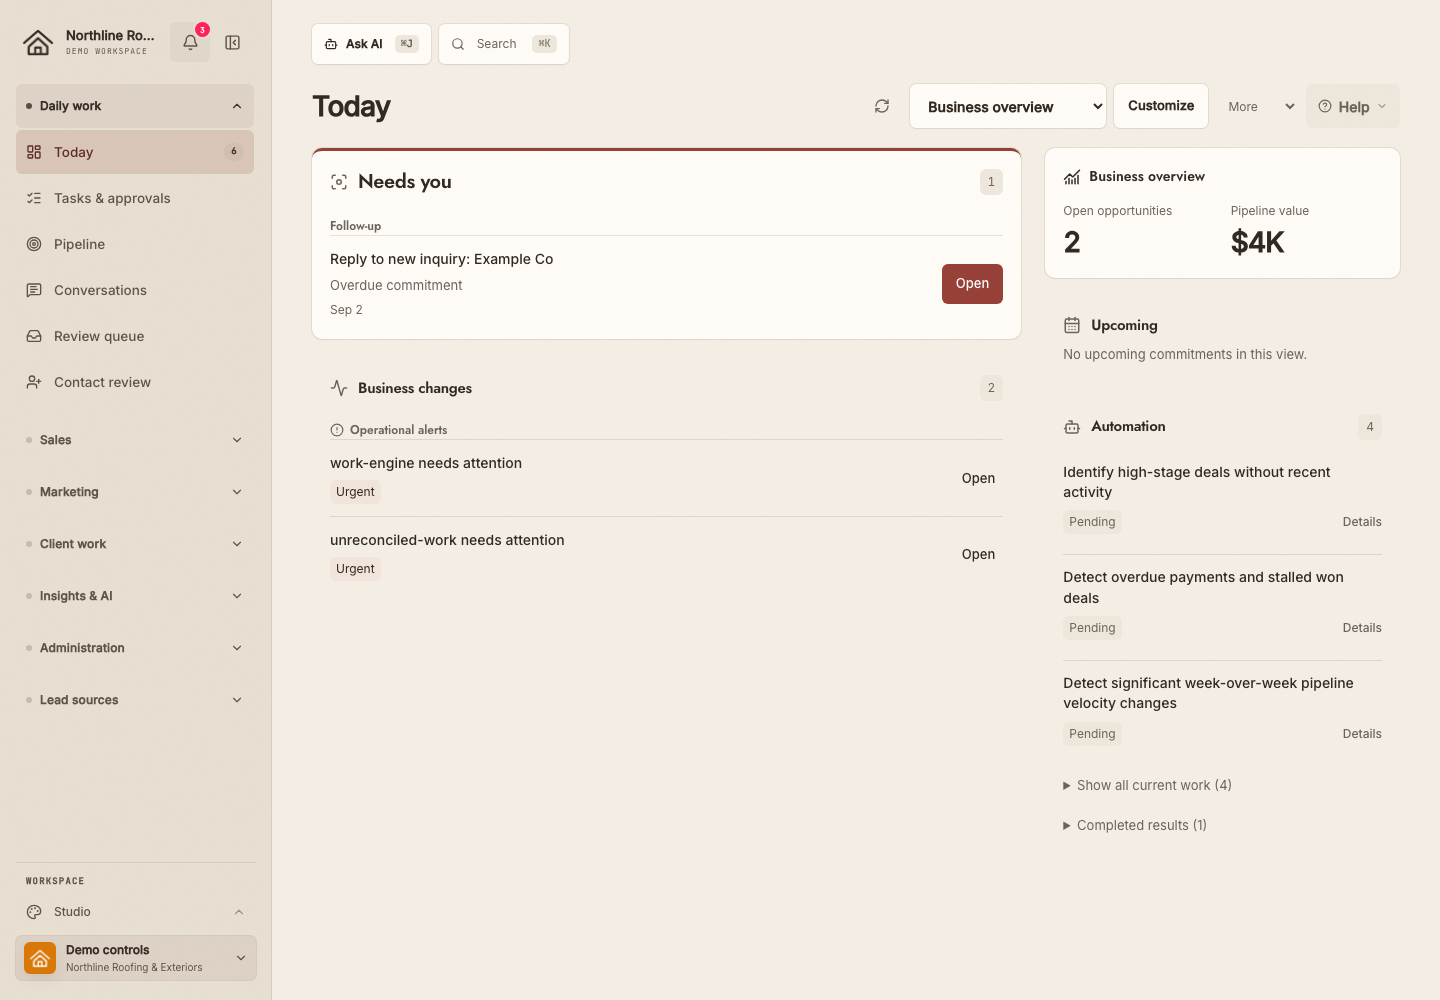
Open Today to see the work that needs a decision, ranked, with the reason attached, then open the proposal to read the exact change the system prepared. A capability starts at always_ask, and after three approvals across at least seven days the system proposes moving it up one rung of the autonomy ladder, so a person confirms every promotion. Review and approve actions shows the proposed fields and the confirmation, and Core concepts defines the vocabulary these screens share.
5. Read the recorded result
After you confirm an action, open Check an action result to read the receipt the system recorded for that specific effect. The receipt names the action, its source record and its terminal state, so you can tell a finished delivery from a queued or failed one without trusting a confirmation message.
What to check
- Confirm the receipt reads delivered before you tell the customer their reply went out.
- Confirm every provider you rely on shows ready in Setup before you run its workflow.
- Confirm the imported person appears once in Contact intake and that the pipeline opportunity links to that same contact.
- Import the same file a second time and confirm existing rows update instead of creating duplicates.
- If a step reports a problem, follow Troubleshooting by symptom before you retry.